Installing tile is fairly straightforward, but there are some common mistakes you’ll want to avoid along the way. Grouting mistakes, in particular, can ruin the look of the tile, no matter how good your installation is. Mistakes such as using the wrong grout, uneven application, and using too much water can yield an end product that won’t last long (and looks unsightly, too). Here, we explain 8 grouting mistakes to avoid when installing tile to guarantee beautiful results.
Mistakes to Avoid When Grouting Tile
While grouting tile isn’t difficult, it can be intimidating if you’ve never done it before. There are many things to pay attention to, you’re using tools you’ve likely never used, and you just spent hours, if not days, installing tile. The last thing you want to do is mess it up during the grouting stage. Here are the grouting mistakes to watch out for to avoid this fate.
1. Uneven Grouting
Failing to apply an even layer of grout between each tile results in an uneven, wavy surface. Once the grout fully sets, the unevenness is visible.
Having the correct tools, such as a clean tile float, and paying close attention to the grout mixing procedure helps guarantee an even grout application.
2. Using Too Much Water
Using too much water in the grout mixture results in a consistency that is too thin. Follow the specific mixing ratio on the grout packaging to yield the ideal consistency so that the grout can sit inside the joint without sagging or running.
While using too much water is less evident on horizontal applications, such as tile flooring, it can make grouting vertical surfaces nearly impossible.
3. Choosing the Wrong Grout
Choosing the wrong type of grout for your installation could ruin the tile finish. The two main grout categories are sanded and unsanded, which refers to the inclusion of sand in the grout.
If you use sanded grout on certain types of tile surfaces, such as glass, polished stone, and metal tiles, you will scratch the surface as you apply the grout. However, sanded grout is necessary for large grout joints (1/8 inch to 5/8 inch) to prevent shrinkage and cracking.
4. Applying Grout Incorrectly
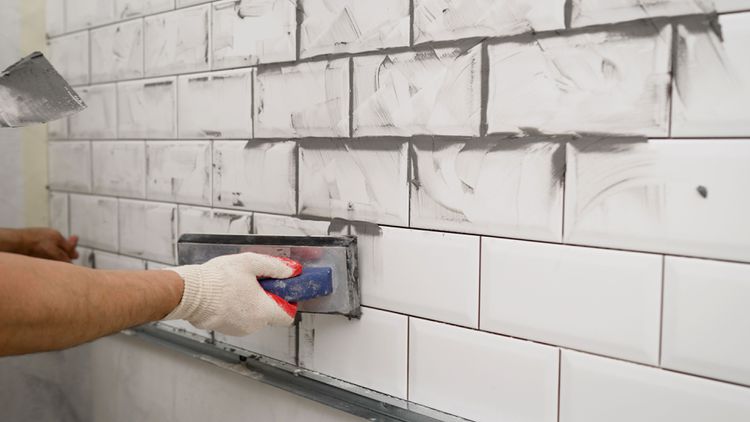
As with the mixing ratio, the grout packaging explains specific instructions for applying the grout to the tile joints. Detailed steps, such as applying at a 45-degree angle to the joint, prevent you from dragging the grout out of the joint as you swipe the float along the tile.
5. Grouting Too Quickly
When you grout too quickly, you wipe the grout out of the joint. When grouting, you must apply a section of grout, let it sit for the specified time on the grout packaging, and then wash the grout lines using a damp sponge.
When done correctly, smooth grout lines are the result. If you do it too quickly, the grout doesn’t have enough time to set up, and you end up washing it out of the joint with each pass.
6. Forgetting to Seal the Grout
Many grouts need to be sealed after they are set. Failing to do so can allow moisture to penetrate the grout and the substrate, compromising the tile surface and posing a water damage threat to your home. Additionally, unsealed grout is at risk of staining.
7. Choosing the Wrong Grout Color
Choosing the wrong grout color can ruin the beautiful tile installation you spent so much time on. You likely spent ample time choosing which tile to use; make sure you give the same energy to the grout color.
8. Ignoring Mixing Instructions
Mixing grout isn’t as simple as putting the dry grout into water and stirring it. Even if you nail the ideal ratio down to the milliliter, you still aren’t guaranteed the perfect grout.
If you read the grout manufacturer’s mixing instructions, you’ll usually find specific times for mixing. These times indicate initial mixing duration, wait time after mixing, secondary mixing duration, and more, depending on the grout.
Additionally, the instructions will likely specify another waiting period to allow the grout to set up slightly after it reaches the ideal consistency and before application. This helps guarantee the grout sits in the joint, even on vertical surfaces.
How to Guarantee Perfect Grout Results
Pay close attention to the instructions on the bag of grout to guarantee perfect grouting results every time. Different manufacturers may take different steps to yield the best results with their specific products. As long as you choose the right grout for your application, mix it properly, and apply it correctly using quality grouting tools, you can guarantee a beautiful grout job every time.
Courtesy of Better Homes & Gardens